RDP2Linux: Remote Desktop into Ubuntu from Windows (the Wayland-era way)
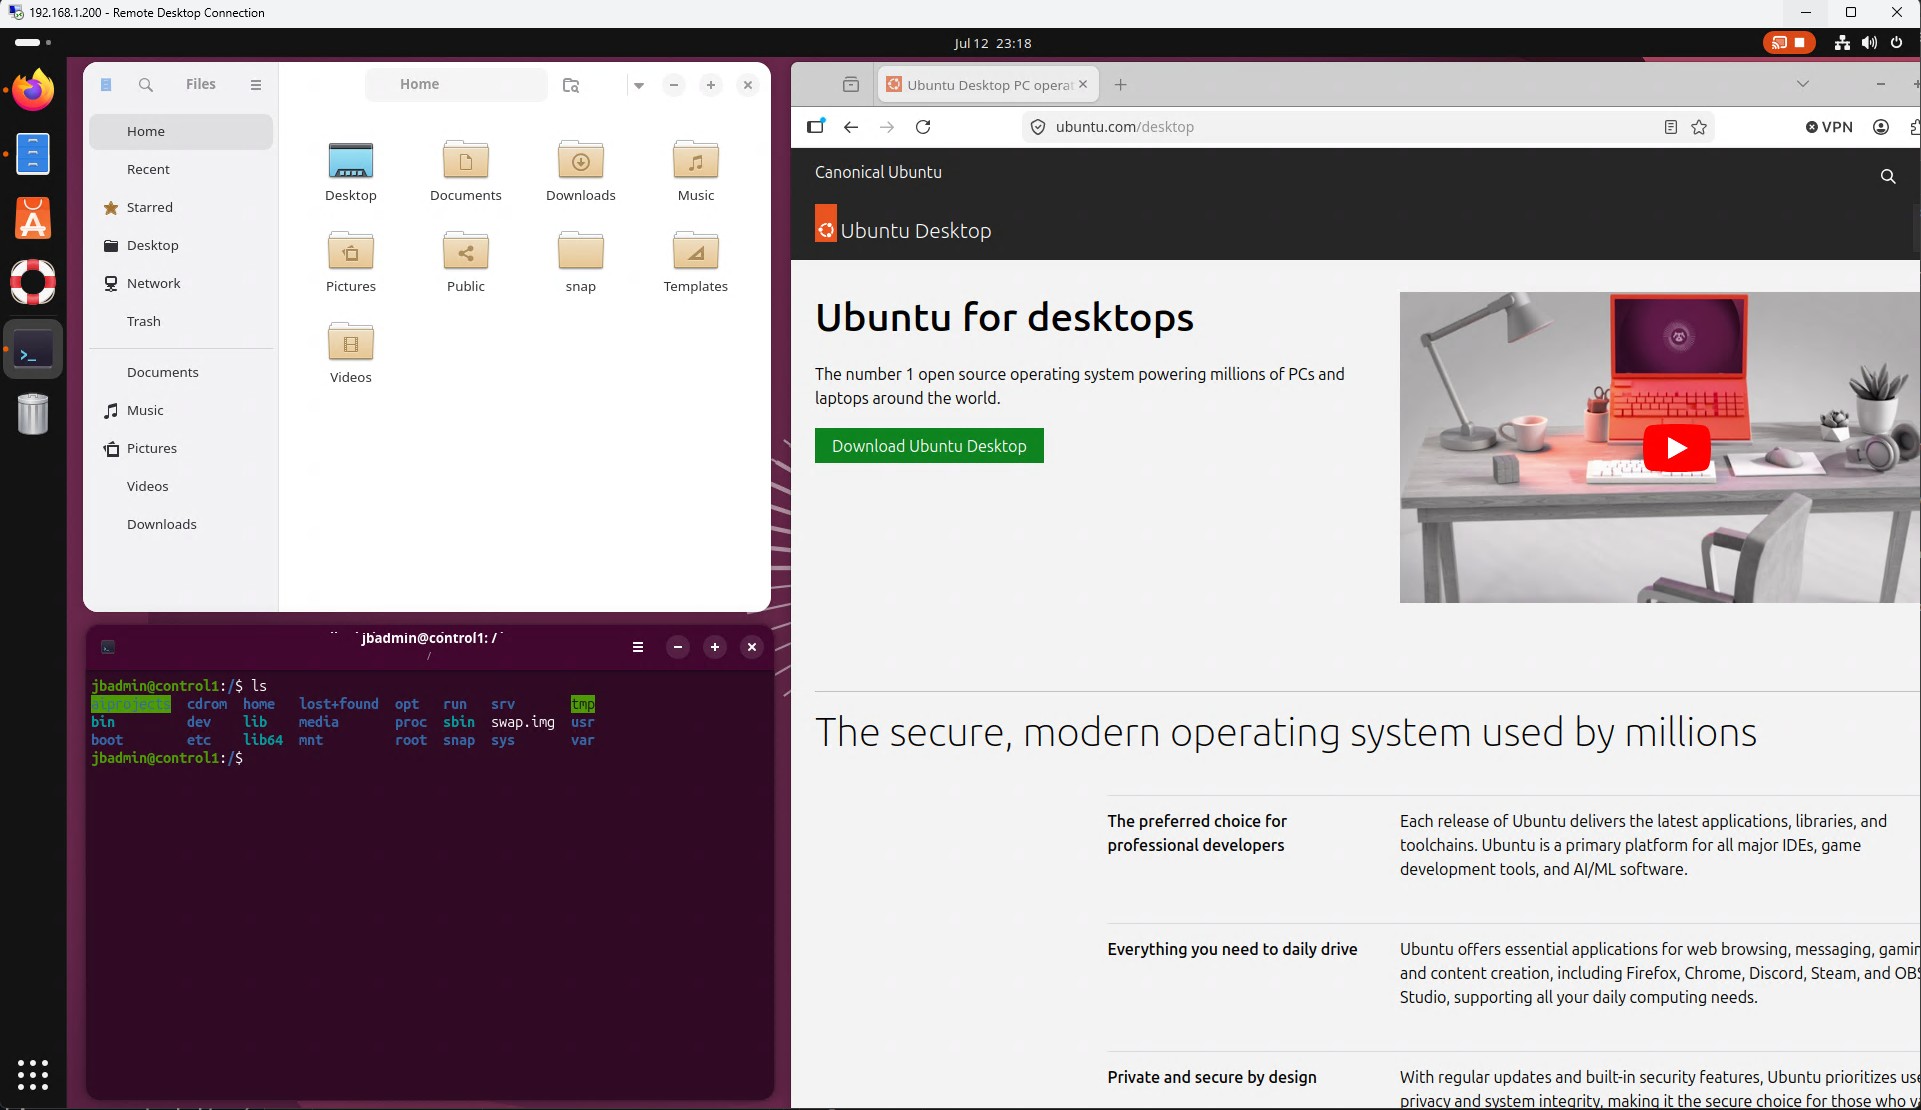
RDP2Linux is a free, Lab-tested guide for connecting to an Ubuntu desktop from a Windows PC using the built-in Remote Desktop Connection client (mstsc.exe) — no third-party software on the Windows side. It documents two supported methods, explains which to use and why, and captures every failure mode discovered along the way with a step-by-step fix.
The problem: RDP into Ubuntu changed with Wayland
RDP into Linux used to be a solved problem — install xrdp, pick your desktop, connect. On modern Ubuntu that recipe quietly stopped working, and the reason trips up a lot of people.
Modern Ubuntu GNOME runs only on Wayland. On Ubuntu 25.04/26.04 the Xorg GNOME session has been removed — GNOME Shell’s systemd unit literally asserts AssertEnvironment=XDG_SESSION_TYPE=wayland and refuses to start under X11.
xrdp serves an X11 display (via xorgxrdp). So the consequence is blunt:
- ❌
xrdpcan never run the GNOME desktop on modern Ubuntu — you get a black screen and a disconnect. - ✅ To get GNOME, use
gnome-remote-desktop(Method A), GNOME’s own Wayland-native RDP server. - ✅
xrdpis still perfectly fine for XFCE or other X11 desktops (Method B).
Both methods listen on TCP port 3389, so you can only run one at a time.
Two methods — pick based on the desktop you want
| Method | Desktop you get | Use when | Works on |
|---|---|---|---|
A. gnome-remote-desktop (recommended) | The real Ubuntu GNOME desktop (Wayland, GPU-accelerated) | You want the authentic Ubuntu experience — required on 25.04/26.04 | Ubuntu 24.04+ |
B. xrdp + XFCE | A lightweight XFCE desktop | You want a fast, low-resource session on any Ubuntu version | Any Ubuntu version |
Prerequisites
On the Ubuntu machine you need Ubuntu 22.04 or newer (24.04+ for Method A), a user with sudo, terminal access (physical or over SSH), and the machine’s IP address. On the Windows side you only need the built-in Remote Desktop Connection client, which ships with every edition of Windows 10/11.
Find the Ubuntu machine’s IP: run
hostname -Ion Ubuntu, or from Windows scan your subnet and identify Linux hosts by their TTL (Linux replies with TTL ≈ 64, Windows with TTL ≈ 128).
Throughout, replace <UBUNTU_IP>, <USERNAME>, and <PASSWORD> with your values.
Method A — gnome-remote-desktop (the real GNOME desktop)
This uses GNOME’s system “Remote Login” daemon. When you connect over RDP it authenticates you and starts a fresh, headless Wayland GNOME session — the genuine Ubuntu desktop, with GPU-accelerated H.264 encoding when a GPU is present. Run every command on the Ubuntu machine (SSH is fine).
Version note: system Remote Login (
grdctl --system) requires GNOME 46+ (Ubuntu 24.04+) — it does not exist on Ubuntu 22.04. The commands below were validated on Ubuntu 26.04; exact behaviour varies by GNOME version.
1. Install the package
sudo apt update
sudo apt install -y gnome-remote-desktop
command -v grdctl
2. Generate a TLS certificate
RDP with gnome-remote-desktop requires TLS. Create a self-signed cert and key (valid 10 years):
sudo mkdir -p /etc/gnome-remote-desktop
sudo openssl req -new -newkey rsa:4096 -days 3650 -nodes -x509 \
  -subj "/CN=$(hostname)" \
  -out /etc/gnome-remote-desktop/tls.crt \
  -keyout /etc/gnome-remote-desktop/tls.key

# The system daemon runs as the 'gnome-remote-desktop' user and must read these:
sudo chown gnome-remote-desktop:gnome-remote-desktop \
  /etc/gnome-remote-desktop/tls.crt /etc/gnome-remote-desktop/tls.key
sudo chmod 640 /etc/gnome-remote-desktop/tls.key
sudo chmod 644 /etc/gnome-remote-desktop/tls.crt
3. Configure the system RDP daemon
The --system flag targets the system-wide “Remote Login” daemon (as opposed to a per-user --headless one):
sudo grdctl --system rdp set-tls-cert /etc/gnome-remote-desktop/tls.crt
sudo grdctl --system rdp set-tls-key  /etc/gnome-remote-desktop/tls.key
sudo grdctl --system rdp set-auth-methods credentials
sudo grdctl --system rdp set-credentials <USERNAME>   # see security note below
sudo grdctl --system rdp enable
⚠️ Security — don’t put the password on the command line.
grdctl --systemre-invokes itself throughpkexec, which records its full command line (including any password argument) in plaintext in the systemd journal. Pass the username only and let it prompt interactively, or rotate the password afterward.
4. Enable, start, and verify
sudo systemctl enable --now gnome-remote-desktop.service
sudo grdctl --system status          # Status: enabled, Port: 3389, credentials set
systemctl is-active gnome-remote-desktop.service   # -> active
sudo ss -ltnp | grep ':3389'         # -> gnome-remote-de listening on 3389
Open the firewall only if ufw is active:
sudo ufw status && sudo ufw allow 3389/tcp5. Connect from Windows — NLA must be ENABLED
gnome-remote-desktop requires Network Level Authentication (NLA / CredSSP). The Windows client uses NLA by default, so a plain connection works — do not disable CredSSP, or you’ll hit error 0xb09.
- Open Remote Desktop Connection (
mstsc). - Computer:
<UBUNTU_IP>→ Connect. - Enter
<USERNAME>and<PASSWORD>. - Accept the certificate warning (expected — it’s self-signed).
To save a reusable shortcut, create an .rdp file with enablecredsspsupport:i:1 (NLA on) and authentication level:i:0 (don’t block on the self-signed cert).
Expect a two-stage login. The system daemon first authenticates you over RDP with NLA, then hands your connection to a fresh GNOME session where a GDM greeter appears and you log in a second time. A brief internal reconnect (“server redirection / handover”) during this step is normal — it isn’t an error.
✅ Method A complete — you now have the real Ubuntu GNOME desktop over RDP.
Method B — xrdp + XFCE (lightweight alternative)
Use this when you don’t need GNOME. XFCE is fast, low-resource, and runs reliably over xrdp’s X11 display.
1. Install xrdp and XFCE
sudo apt update
sudo apt install -y xrdp xorgxrdp xfce4 xfce4-terminal dbus-x11
sudo adduser xrdp ssl-cert          # lets xrdp read its TLS material
sudo systemctl enable --now xrdp
2. Force the X11 backend (critical)
XFCE 4.20+ may auto-select a Wayland backend, which renders a blank screen over xrdp (missing layer-shell protocol). Force X11 with an ~/.xsession for the connecting user:
cat > ~/.xsession <<'EOF'
#!/bin/sh
unset WAYLAND_DISPLAY
export GDK_BACKEND=x11
export QT_QPA_PLATFORM=xcb
export CLUTTER_BACKEND=x11
export XDG_SESSION_TYPE=x11
xset s off 2>/dev/null || true
xset -dpms 2>/dev/null || true
exec startxfce4
EOF
chmod +x ~/.xsession
3. Disable light-locker
xfce4 may pull in light-locker, a screen locker designed for LightDM. On GNOME/GDM systems it misbehaves and can switch the physical console to the lock screen when you interact remotely. Disable its autostart:
mkdir -p ~/.config/autostart
cat > ~/.config/autostart/light-locker.desktop <<'EOF'
[Desktop Entry]
Type=Application
Name=light-locker
Hidden=true
X-GNOME-Autostart-enabled=false
EOF
4. Restart and connect
sudo systemctl restart xrdp
sudo ufw status && sudo ufw allow 3389/tcp   # only if ufw is active
xrdp presents its own login screen and does not support NLA. Connect with mstsc to <UBUNTU_IP>, choose session Xorg, and enter your credentials. If you use an .rdp file, disable NLA with enablecredsspsupport:i:0.
✅ Method B complete — you now have an XFCE desktop over RDP.
Troubleshooting: the failure modes that actually happen
The guide’s most valuable section is its symptom → cause → fix table, built from every real failure hit during testing. A few highlights:
| Symptom | Root cause | Fix |
|---|---|---|
Black screen, then disconnect (xrdp + GNOME); log shows Window manager exited with signal SIGABRT | GNOME Shell needs GPU + Wayland; it aborts on xrdp’s X11 display | Use Method A for GNOME, or Method B for XFCE |
| Blank/black screen with XFCE; log mentions “compositor must support zwlr_layer_shell_v1” | XFCE started with the Wayland backend | Force X11 in ~/.xsession (see B2) |
| Desktop icons show but no panel | An orphaned xfce4-panel from a previous session holds the D-Bus lock | pkill -u <USERNAME> -x xfce4-panel and reconnect |
mstsc error 0xb09 — “requires Network Level Authentication” | Client has CredSSP/NLA disabled, but gnome-remote-desktop requires it | Enable NLA: enablecredsspsupport:i:1 |
[RDP] Credentials are not set, denying client | No RDP credentials on the server | sudo grdctl --system rdp set-credentials <USERNAME> |
When in doubt, check the server logs first: sudo journalctl -u gnome-remote-desktop.service -f for Method A, or sudo tail -f /var/log/xrdp-sesman.log /var/log/xrdp.log for Method B.
Switching between methods
Both servers bind port 3389, so only one may be active. Disable one before enabling the other:
# Switch to gnome-remote-desktop (GNOME):
sudo systemctl disable --now xrdp xrdp-sesman
sudo grdctl --system rdp enable
sudo systemctl enable --now gnome-remote-desktop.service

# Switch to xrdp (XFCE):
sudo grdctl --system rdp disable
sudo systemctl disable --now gnome-remote-desktop.service
sudo systemctl enable --now xrdp
Verify which is listening with sudo ss -ltnp | grep ':3389'.
Security considerations
- Self-signed certificate. The client can’t verify the server, so it warns on connect. For anything beyond a trusted LAN, deploy a certificate from an internal CA and distribute the CA to clients.
- Password in the journal. As noted above,
grdctl --system ... set-credentials <user> <password>logs the full command line in plaintext viapkexec. Prefer the interactive form, or rotate the password afterward. - Dedicated credentials. Consider a dedicated account for remote access rather than a privileged admin account.
- Network exposure. Do not expose port 3389 directly to the internet. Restrict it to trusted networks or require a VPN, combine with firewall rules, and where possible add
fail2ban.
Wrapping up
The short version: on modern Ubuntu, reach for gnome-remote-desktop when you want the real GNOME desktop, and xrdp + XFCE when you want something light and X11-based. Both give you a full remote desktop from the stock Windows client — no extra software required.
Tested end-to-end on Ubuntu 26.04 LTS (GNOME 50, gnome-remote-desktop 50.0) connecting from Windows 11; the concepts also apply to Ubuntu 22.04 / 24.04.
← Back to all posts